Results! Training Real-time Style Transfer
About a week ago (plus or minus a month), I wrote the models and datasets for real-time style transfer with AdaIn. In this post, I’ll get to training. By the end, I’ll show some stylized images. If you’re just here for the stylized images, feel free to skip to the end :).
Recap
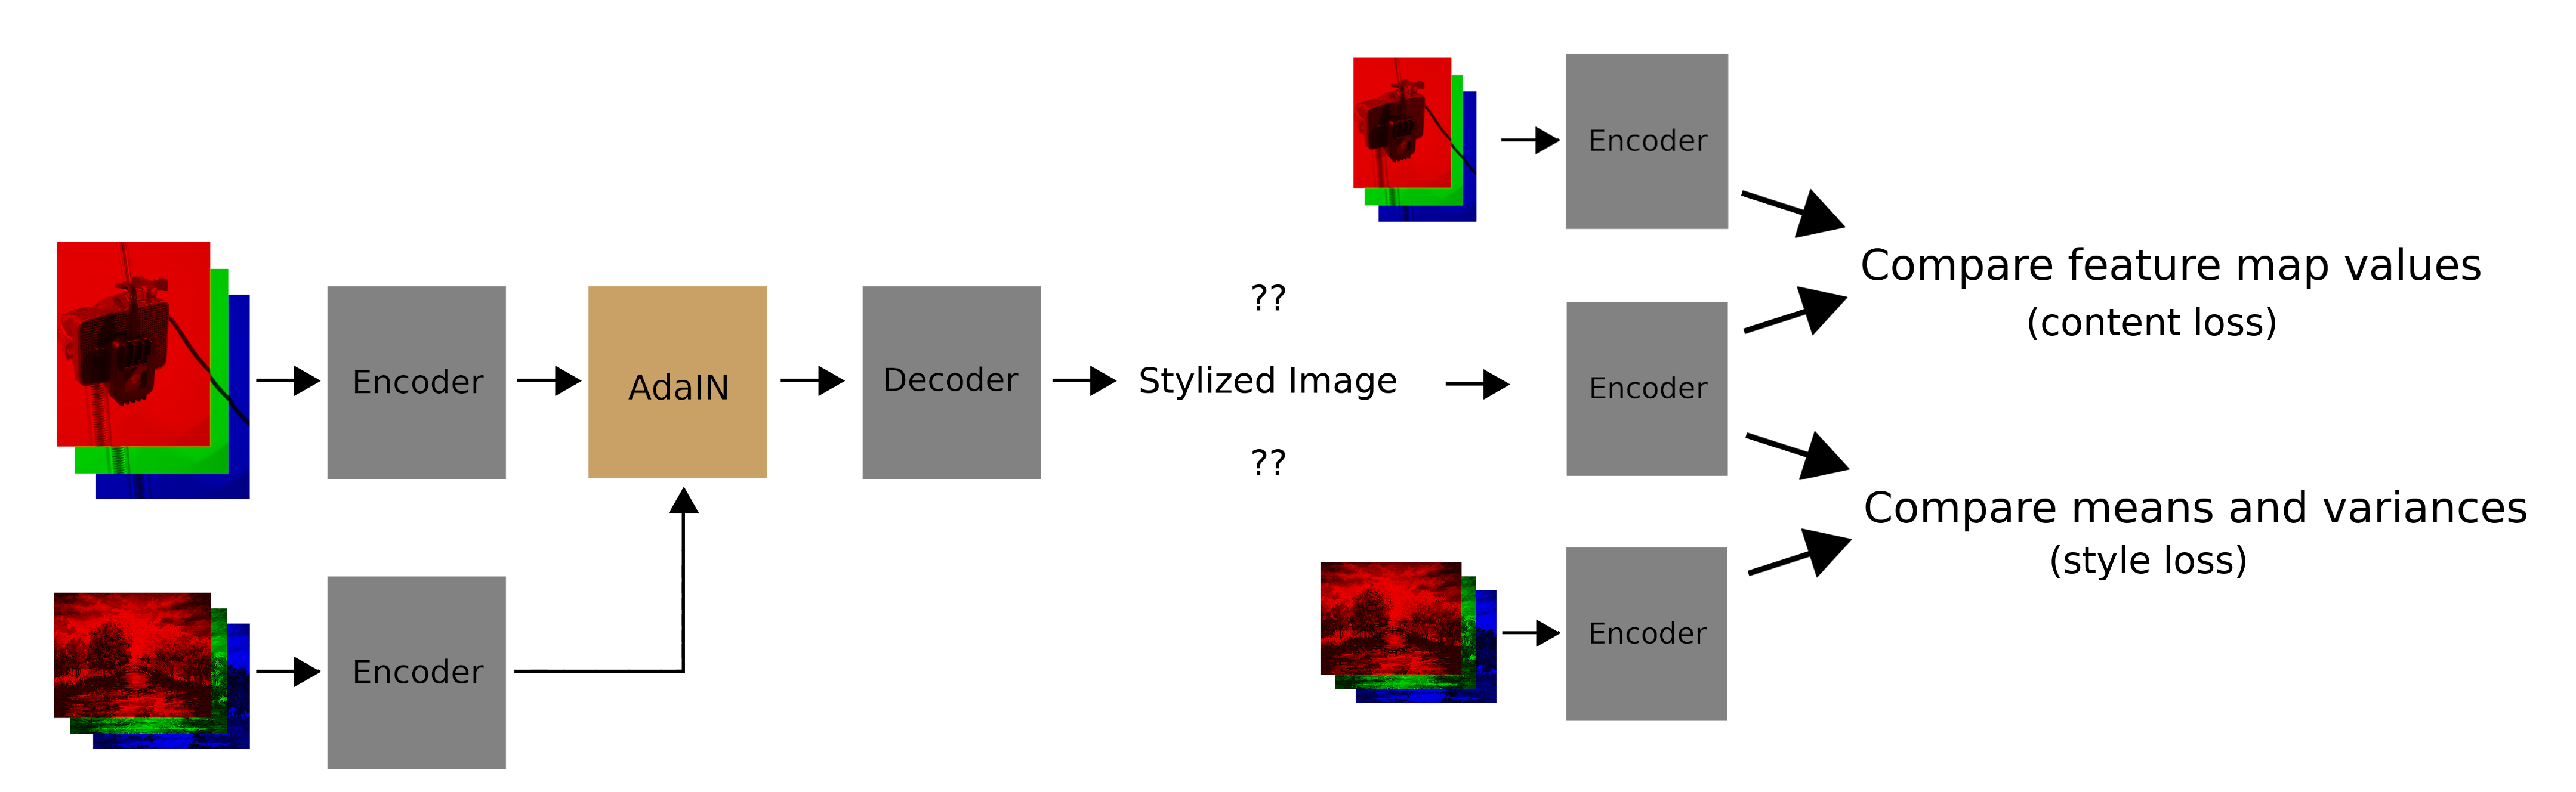
Here’s how AdaIn works:
- Encode the style and content images
- Adjust the feature-map statistics of the content encoding to match those of the style encoding
- Decode the adjusted content encoding into a stylized image
- Compute a style loss and content loss for the stylied image (only during training)
Last post I wrote the encoder, decoder, adain function, and a dataset class.
Training for Reconstruction
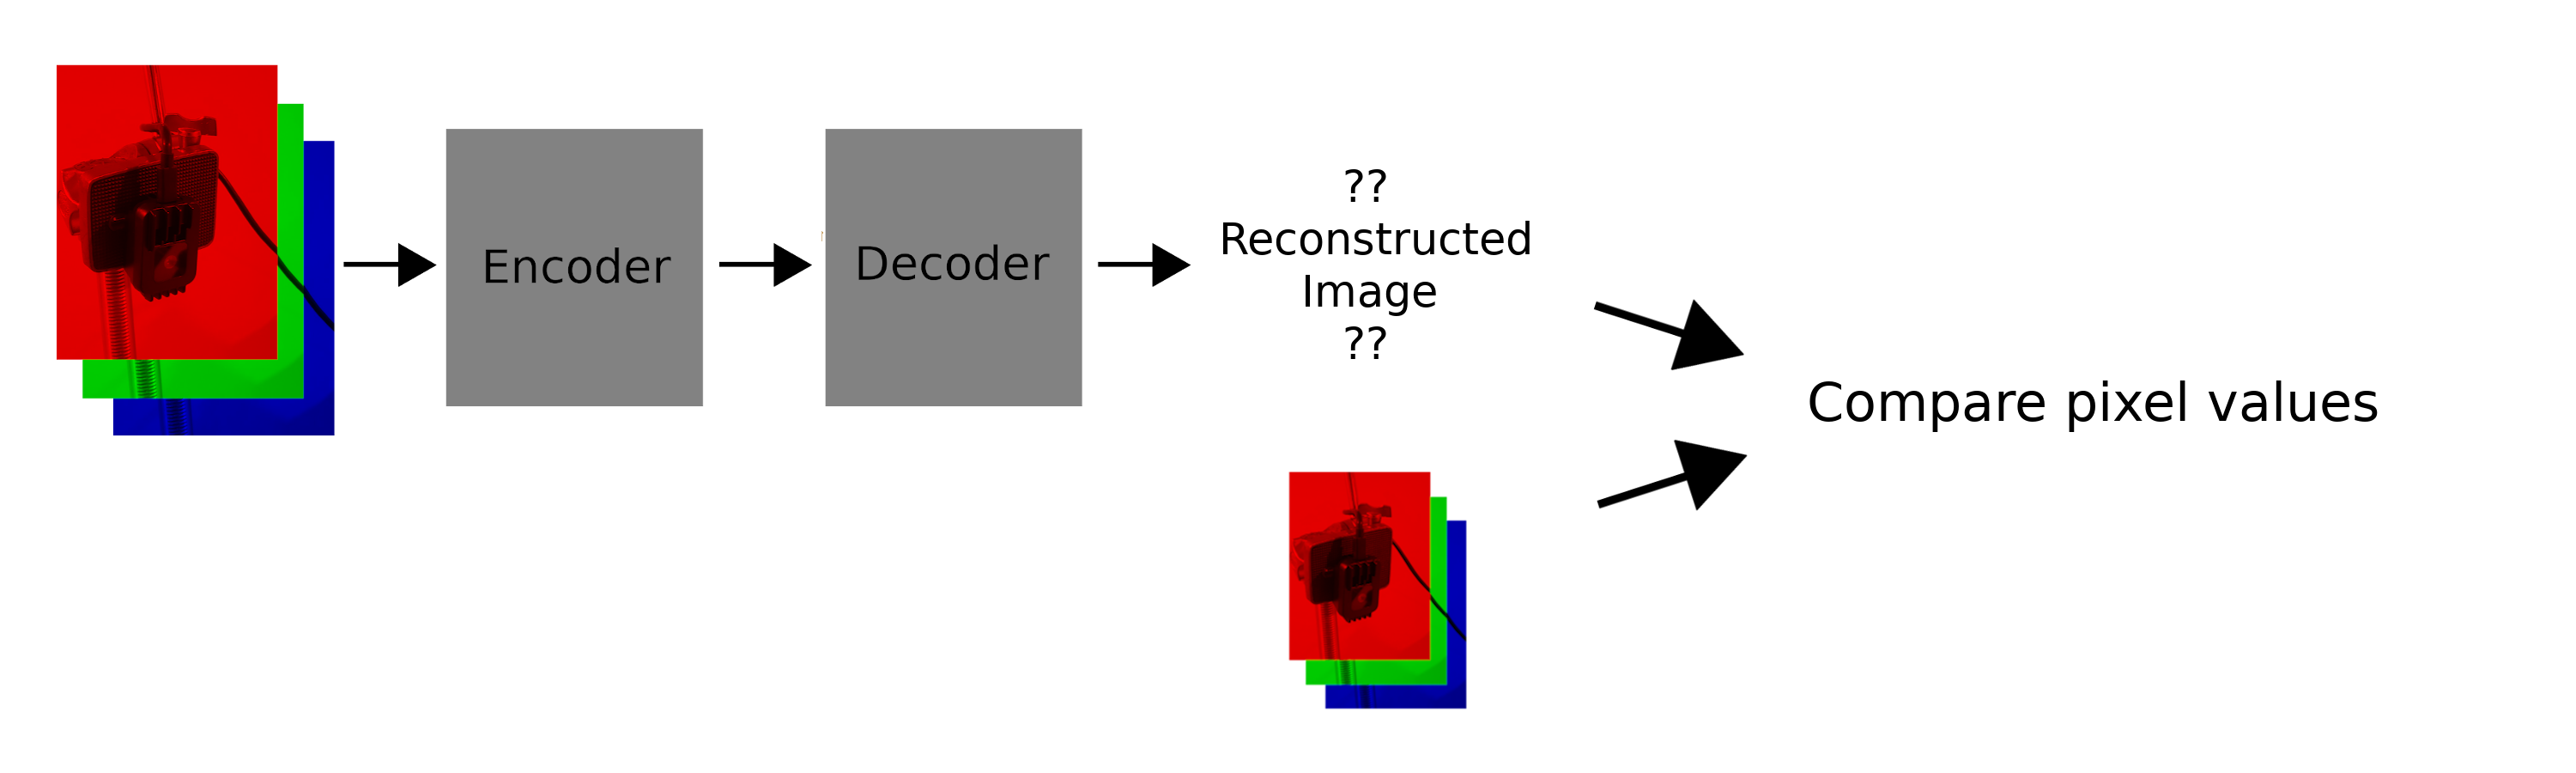
To ensure the encoder / decoder worked nicely together, I first trained them to simply reconstruct an input. This is what that pipeline looks like:
Shoutout to Jacob Lee for writing some of the initial training pipeline.
We simply encode and decode an image. The loss is the sum of the squared differences between the input and output.
If you would like to see the code for reconstruction, it is here. However, it uses older versions of the encoder / decoder, and the code I’d written then is a lot less clean.
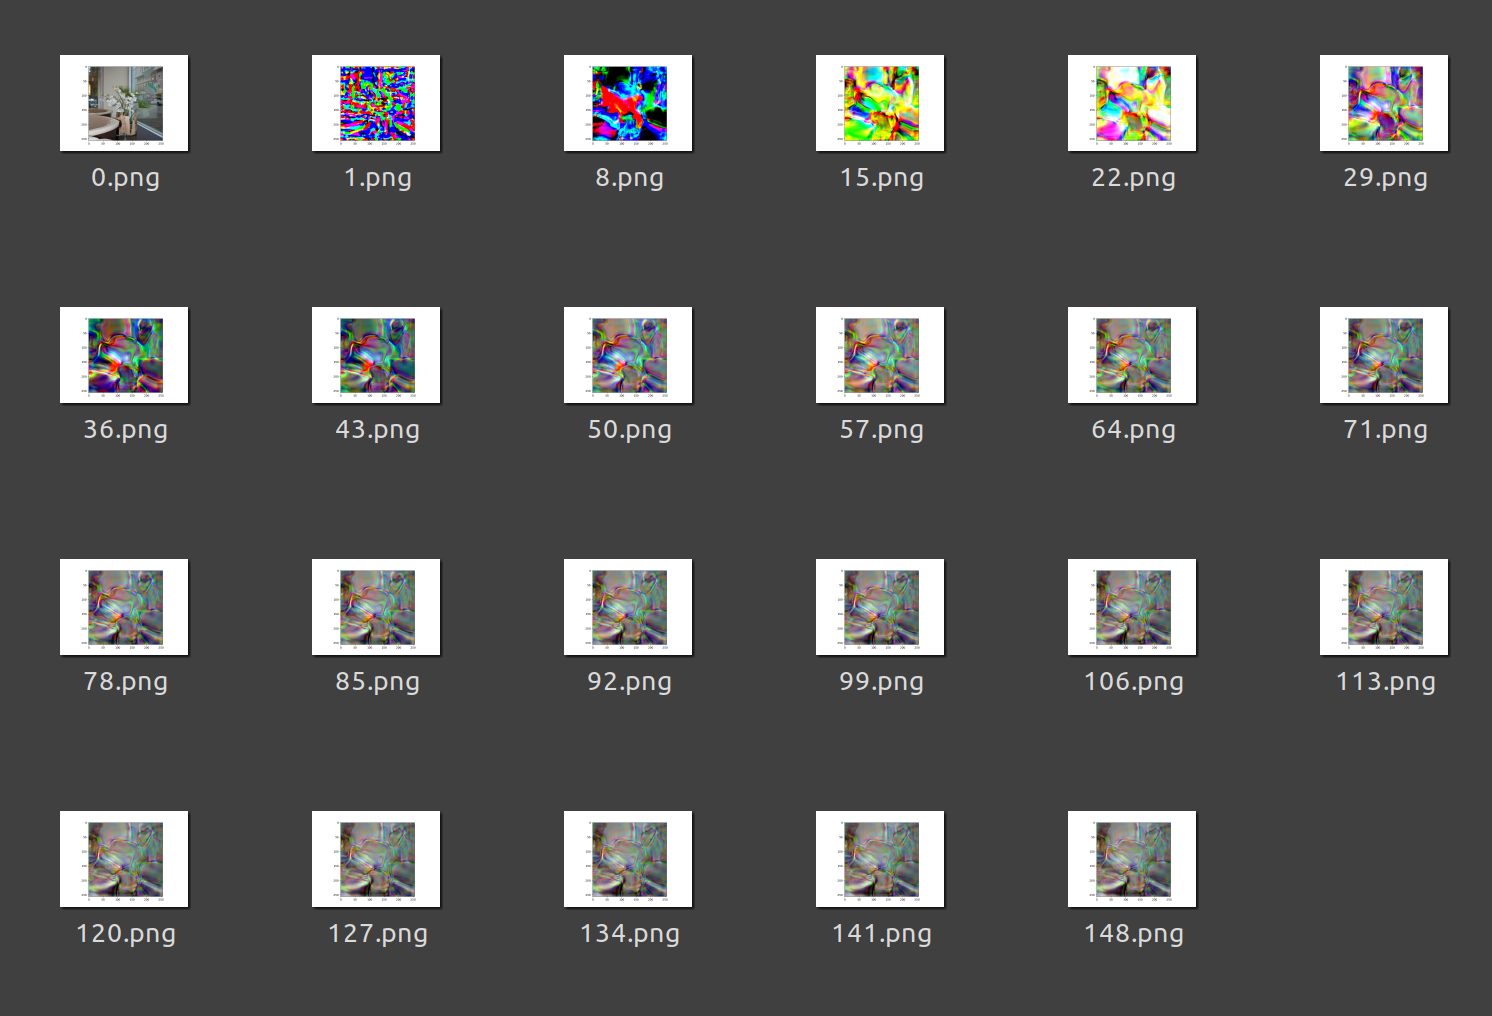
At first I trained on one image, on my CPU. This was the image I aimed to reconstruct:

After 71 epochs however, I wasn’t sure if things were progressing, and was growing concerned (very concerned; this part was not supposed to be hard):
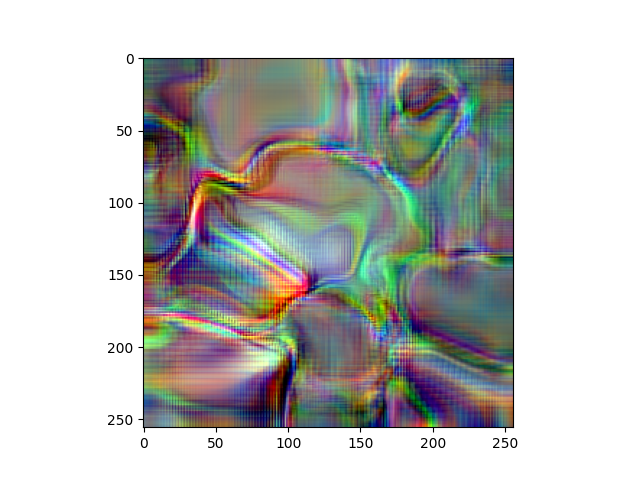
Interestingly however, the progress is much clearer if you are zoomed out (the image above is 71.png below); my guess is that this is because low frequency information might be learned first:
After this, I moved onto AWS to train a larger reconstruction demo using a GPU. I used a g4dn.xlarge AWS instance, though you could also use Google Collab (much cheaper, less reliable). I won’t get into the weeds here, instead I’ll point you to a few valuable resources:
CMU’s Introduction to Deep Learning (Spring 21) - Recitation 0C and 0D are about deep learning with AWS and Collab.
CMU’s Introduction to Deep Learning (Fall 20) - Recitation 0D and 0E; different versions of the above.
Below are some of the reconstructions over time. For each pair, the target is on the left, and the reconstruction is on the right:
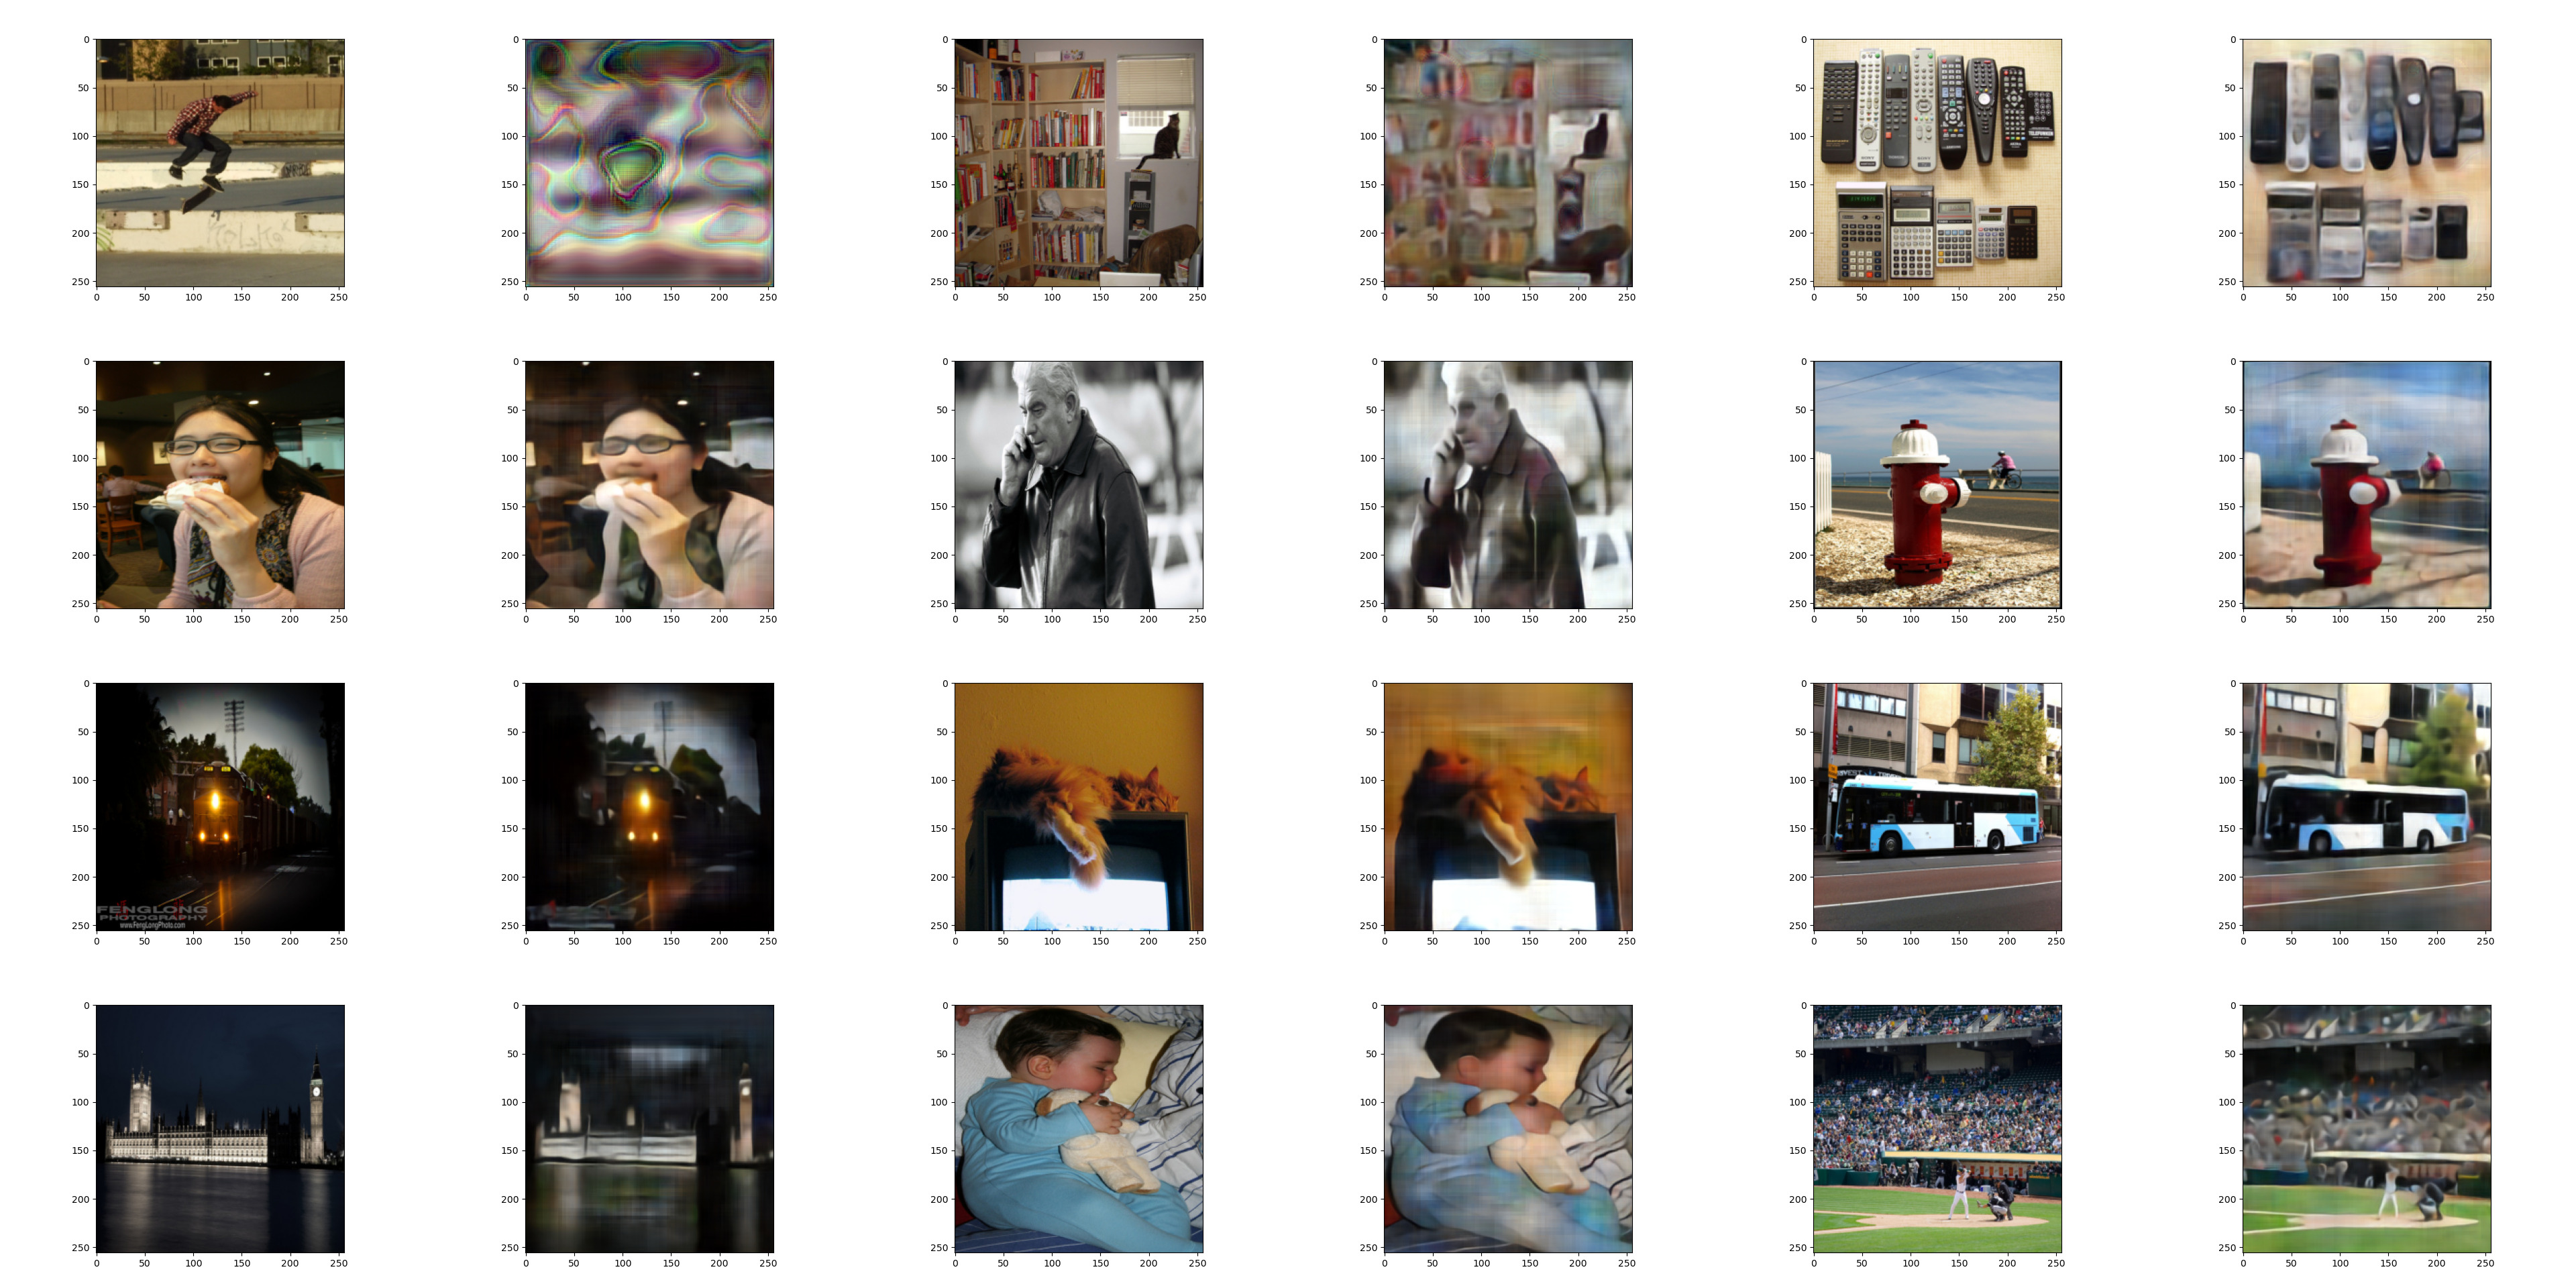
You can see the first and second reconstructions in the first row are pretty terrible, but the model quickly gets better at reconstructing the input image. Another interesting thing I tried with reconstruction was using batch normalization in the encoder, and skipping initialization in the decoder. This saved time coding, but heavily impeded training, especially during initial experiments on only one image.
The AdaIn Model
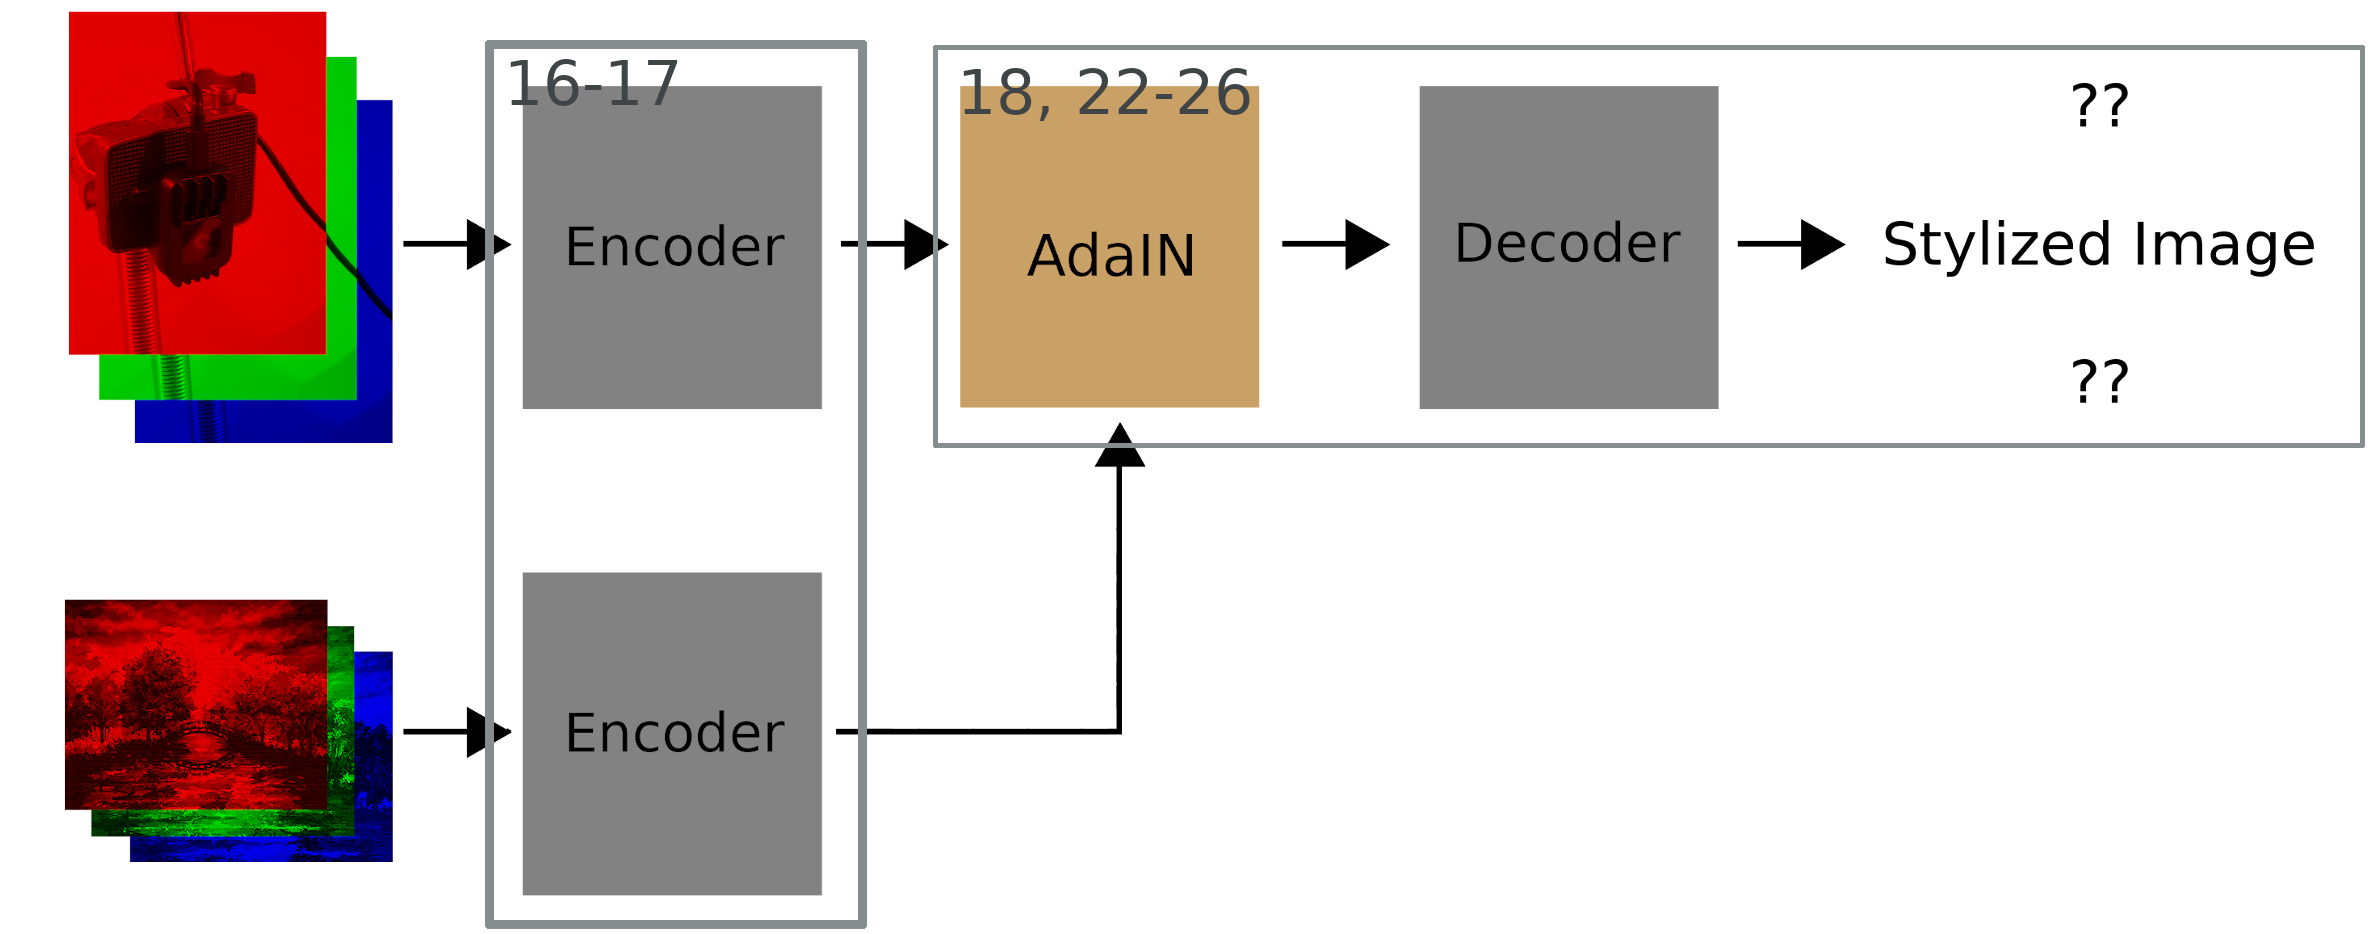
With all of the necessary components and reconstruction working, I packaged everything up in a class StyleTransferModel. It creates an instance of an encoder and decoder for itself. Here are the important methods it has:
We encode the style and content images, and then use AdaIn on the encodings, and decode the stylized content encoding. Below I’ve labeled which lines of code do what on part of the training diagram.
The Training Pipeline
Now for the training pipeline. I’m going to completely skip over explaining main.py, validate.py, and swaths of train.py as well. Most of main is dealing with argument parsing, and much of validate is already covered in what I’ll cover in train. Also, a bunch of train is not specific to style transfer.
First I’ll start with the main training loop. On lines 43-53 I’m looping through the images and putting them on the GPU. On lines 63-70, I’m logging things so I can track training; write_to_tensorboard does everything like validation etc., and I won’t go over it here.
Lines 55-61 are where things are more interesting. I clear the gradients (56), calculate the loss (57-59), calculate the new gradients (60), and then update the model weights (61). Next we can look at the function used on line 57 in depth.
Line 74 does much of the heavy lifting; after that we calculate the loss from our various features and return it. The following diagram shows which line does what when we are calculating the loss.
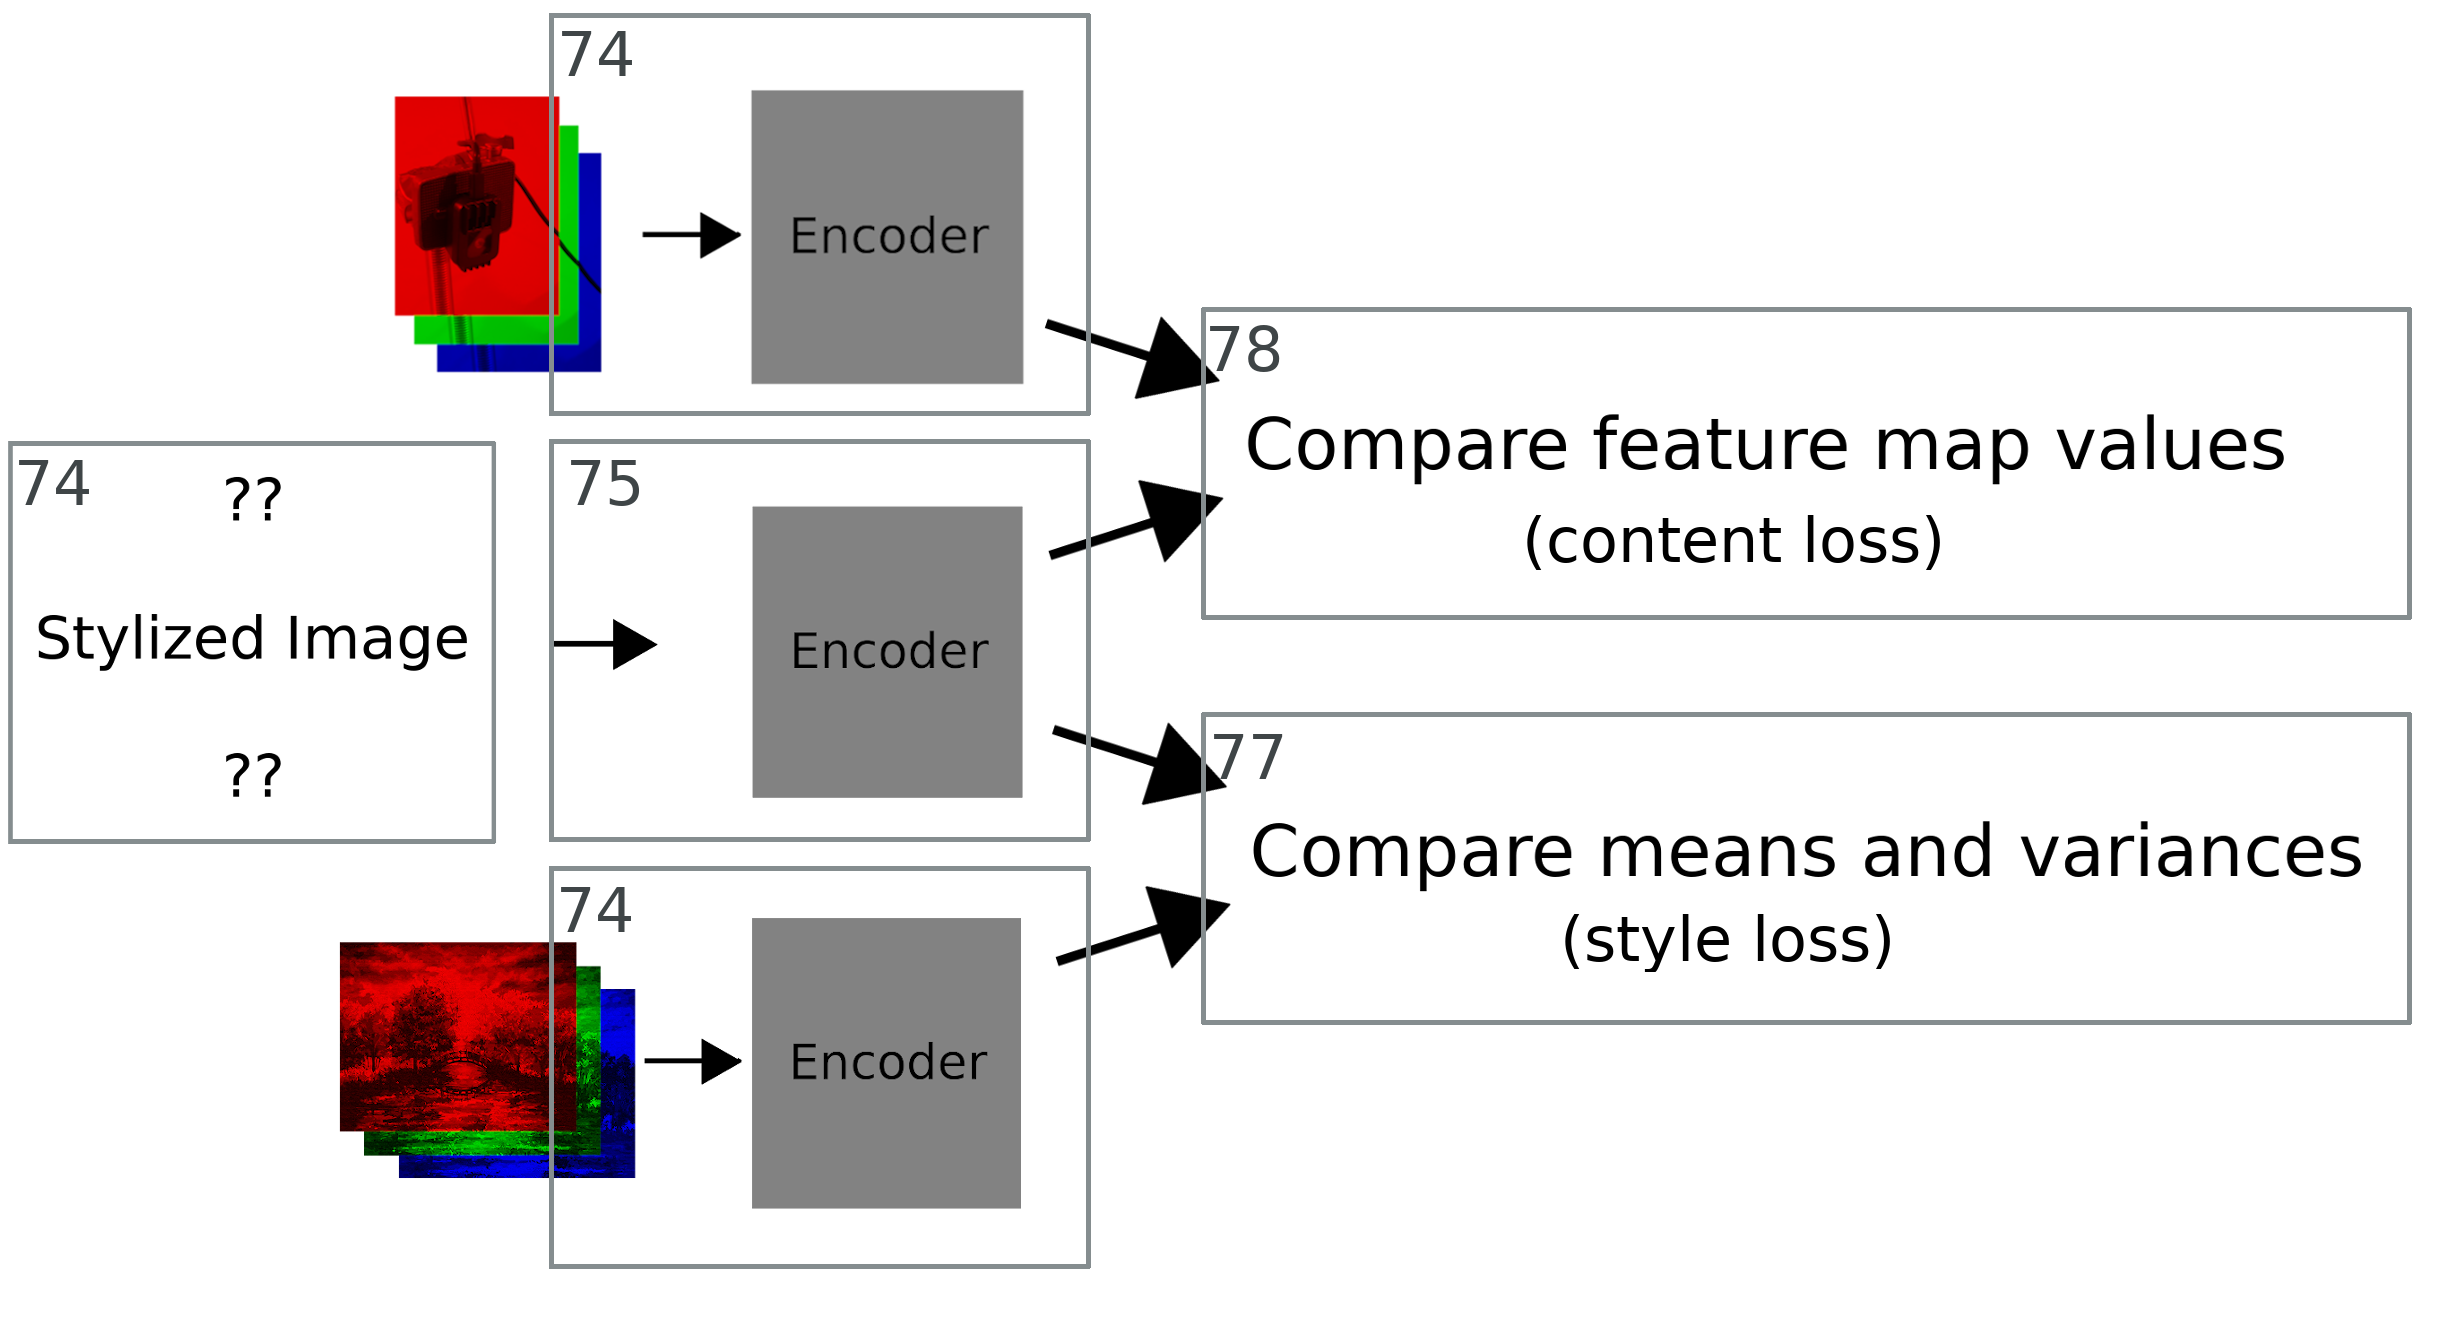
The last two functions are responsible for actually calculating the style and content losses. They are below for completeness, but I will not talk too much about them, as I talked about the math behind them in the first post.
There is one big deviation I had here between the original paper. For some of the loss terms, I average the style loss between feature maps, rather than sum over them. Because deeper layers have more feature maps, this means that the loss from deep features will not be as dominant over the loss from more shallow features.
Adventures in training…
As I mentioned, I probably spent weeks hunting bugs in my implementaiton. Hence why this post is months late. So before I say, “and now it works, ta-da!”, I’d like to mention some experiments that I tried, and that failed, along with some ideas I had along the way.
First of all, I tried many many many experiments on just a few images. What I found was that generally, these gave quite good results. However, these experiments were still very sensitive to hyperparameters, such as the style-content tradeoff. Here is an examples (note this is before I added batchnorm to the encoder):
Bottom right is the original image. From left to right, top to bottom, the style loss weight is increasing. You can see that without enough style weight, the image ends up looking quite dark; content loss alone is not good enough to bring out the original image, at least not early on in training.
I also tried training with and without random cropping. Initially the cropping made convergence a lot slower, but this was solved once I fixed the rest of the issues that I will talk about below.
After getting some models to converge with small examples, I tried using a larger training dataset. What quickly happened is that the styles all converged to a muddy brown, with painting-like strokes. Basically, the styles were all the same. I also noticed the color of the final layer’s biases was very close to the average color of the WikiArt dataset. Here’s what things looked like:

No amount of hyperparameter tuning, lowering of regularization, etc. would fix this problem at first. I burned a lot of AWS money. I also tried removing the bias in the last layer. This didn’t really help.
Along the way I hypothesized that weighing the style loss layers differently (maybe further enweight earlier layers) might help the color come out, as earlier layers are closer to the raw RGB data. This didn’t really help. So I also tried another experiment; I played around with the loss function. Some style transfer papers don’t take a square root after calculating the L2 difference between between style vectors. I tried both, and had the feeling that the square root converged faster; I think this might be because the square root dampens the difference in effect of the various style losses, but I would have to do more pointed experimentation to find out.
This also lead me to discover that by default, the layer losses of the deeper layers are greater in magnitude.
All of the above problems were mostly fixed by adding batch normalization to the encoder. The time wasted sucked, but did get me to think about the problem in a deeper manner. Would taking a larger root (rather than L2 norm) further improve the balance of the style losses? Would it matter? Does the bias in the last layer hurt the model? If the encoder was trained as a normalization-free network, would the model work without the batch normalization? What if we enabled AdaIn at multiple points in the decoder?
While interesting, I probably won’t pursue these questions, as there are other parts of the project I want to get to.
Results
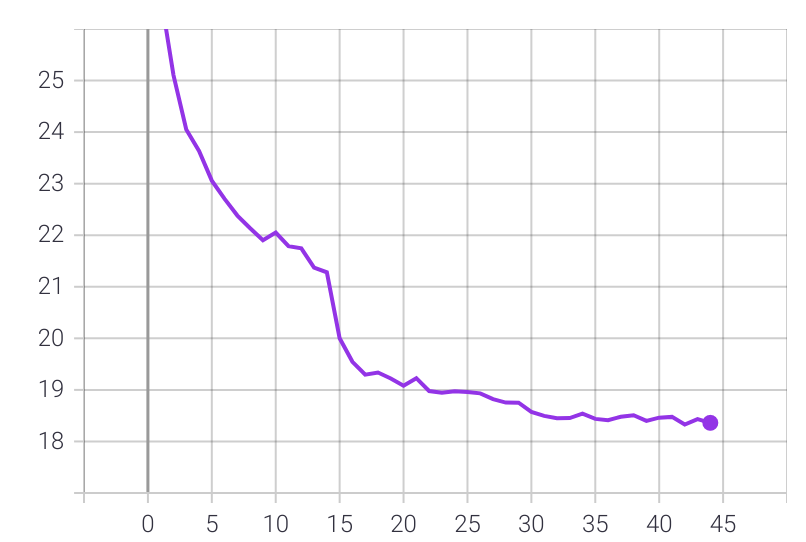
After finally adding those batchnorms, here is one of my my training curves (ignore the premature learning-rate scheduling):
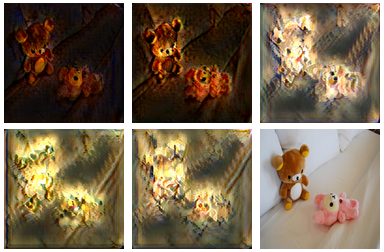
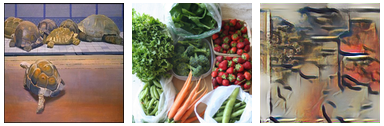
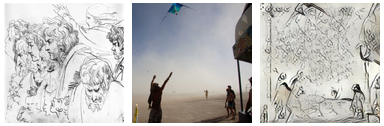
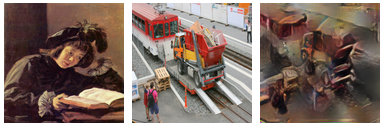
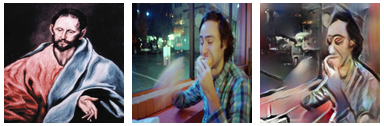
Furthermore, here are some stylizations throughout training; each triplet is shown in the order style image, content image, stylized image:
And that’s it! I think I have room for improvement, but for now I’m very happy to have this figured out; I definitely expected this whole project to done by now. But then again, that’s how most of these go XD.
Anyhow, the next post should take a lot less time (fingers crossed), in part because I’ve already done some tinkering with getting models on the OAK-1. See you then!
| Back to Project |
Get occasional project updates!
Get occasional project updates!