OpenCV AI Kit: Writing a Model Pipeline
We’re getting closer! So far we have a working style transfer model. However, we haven’t even started talking about moving models to the OpenCV AI Kit, and our current model is likely too big to do so. In this post, we’ll handle that first problem; I’ll walk through the process of getting a (super) simple model on the OpenCV AI Kit.
Prerequisites
But first, let’s have fun installing fun packages. My goal in this section is not to supply every requirement necessary, but to point in the correct direction.
Behind the OAK is the DepthAI API. They have a first steps section, which will help get a pretrained model up and running on the OAK. I followed those steps here.
Upon running the demo python3 depthai_demo.py, I could move the OAK-1 around and see its predictions about my environment. This showed that I had the basic dependencies installed correctly:
The next step was to install dependencies so that I could put custom models onto the OAK-1. For this we need something from Intel called OpenVINO. DepthAI has instructions for installing it here, but I found it a bit lacking. In particular, upon installing everything, I found some components were missing. Perhaps this is fixed, but in any case, on the Intel website, on the left hand side I found an option to install from APT, since I am on Linux.
Once I had added the correct installation repository using APT, I ran apt list | grep openvino to view the installation candidates. I installed the dev and runtime packages of OpenVINO.
After installing on Linux, I now had a folder called /opt/intel/openvino_2021. In this folder, the file that will be needed later was deployment_tools/model_optimizer/mo.py. On a different OS, this will not be the case.
Additionally, in my ~/.bashrc I now had the line source /opt/intel/openvino_2021/bin/setupvars.sh.
This was pretty much it in terms of dependencies.
The Big Picture
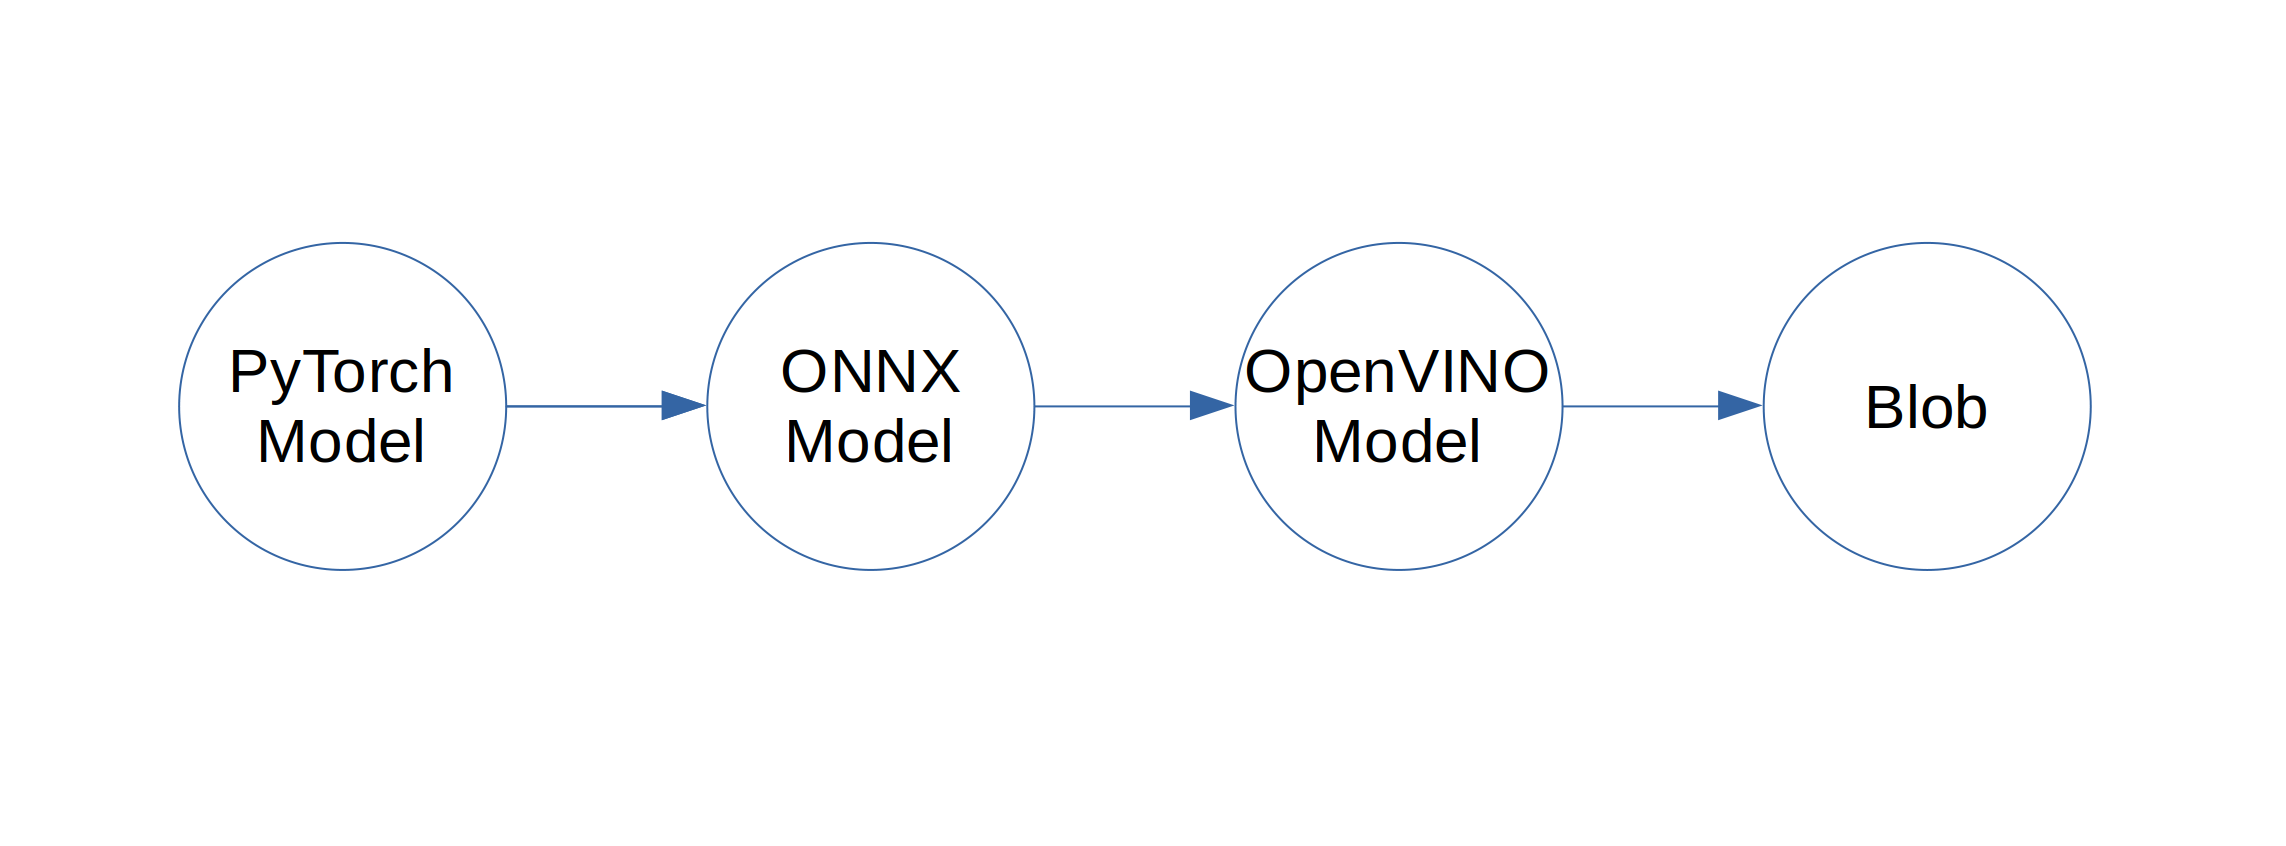
Now that we have things installed, let’s step back and look at how everything will fit together here. First, we train a model in PyTorch. Then, we can also use PyTorch to export that model to ONNX. Next, we use OpenVINO to optimize and convert the ONNX model into a different format. Afterwards, we use a web API to convert from that format into a blob that the OAK-1 can use. Lastly, we put the blob onto the model and run it. Here is what that looks like in diagram form:
And here is what that looks like in code, using a “test” model:
Lines 3-5 perform model conversion, and the rest of the code runs the model.
Exporting with ONNX
ONNX (Open Neural Network Exchange) is supposed to be a format for specifying any deep learning model, so the first step is to get from PyTorch to ONNX for a simple “test” model. The “test” model just divide its input by two and return the output. While this seems super simple, it’s not so different from style transfer; we need to do some transformation to the input and then return it. So this is a perfect first go.
I wrote the model export code in a file called export.py. First I define the test model:
I think it speaks for itself :).
Next I use torch.onnx to export the model. Here I create an instance of the model, and a test input that doesn’t carry around gradients. The function torch.onnx.export will run the input through to see what operations the model is using, and then use this information to convert to the ONNX format.
After running this function, I get a test.onnx file!
Optimizing with OpenVINO
The next step is to optimize the model, which also moves from the ONNX format to whatever Intel is using. With my version of OpenVINO, and on Linux, this is what that looks like:
In using this command, I’m using the model optimizer tool on the ONNX file, and also converting to 16-bit numbers. This will be faster and take up less memory then the original 32 or 64-bit numbers the model uses. The output of this command is a .bin, .xml, and .mapping file.
Running this in Python looks a bit different; I have to call it using the subprocess library. I also move the outputs to the exports folder:
Running optimize_model(“test”) now creates all of those intermediate outputs.
Converting to a “blob”
Next is blob conversion. DepthAI have a nice API for this, so it’s short and sweet:
Supposedly you can also do the blob conversion with deployment_tools/tools/compile_tool/compile_tool under the OpenVINO installation. However, I found the outputs produced using that tool did not work on the OAK-1. This is probably a versioning problem.
Creating the Pipeline
Next up was to create what depthaAI calls a “pipeline”. This is a description of what the OAK-1 should be doing. The following code creates the pipeline:
You can see that we have three nodes, the camera input (cam_rgb), the neural network (detection_nn), and the output (xout_nn). These all get linked together, and then we return the entire pipeline.
Running the Pipeline
The next step is to run this pipeline. I will include the code here, but it’s not super noteworthy. We grab the last output of the pipeline, and do some wrangling so that it’s in the format that OpenCV expects. Then, we use OpenCV to show the output in a preview window. Here it is:
Results
As a reminder, this is what the main method looks like:
After running things, I get what I had earlier, but more dim (as everything is divided by two), and without the predictions (since my divide-by-two model has none of that):
Closing Thougts
At this point, we can get models on the OAK-1 very easily with the code we’ve setup (by running just one script!).
Though it seems this step was easy, I definitely lost many hours earlier this year trying to get this to work. I think a big part of this is because depthAI and the OAK-1 is very young (I backed the kickstarter a bit over a year ago). This means that some of the things that I got working more recently were a huge pain back in March. For one, the blob converter and model optimizer did not all show up in all versions of OpenVINO. Additionally, I ran into wierd compatibility issues that I could not figure out. I also ended up having to dig through the depthai C and Python code back then to try to find the usage that I wanted.
But trying to do all of that more recently, it just seems to work, and the documentation is much clearer. Which in retrospect, is to be expected of a budding project.
I’m quite certain we will hit some more roadblocks along the way, but for now, I think this is good progress. See you all next post!
| Back to Project |
Get occasional project updates!
Get occasional project updates!